
前回の記事はこちら
https://webird-programming.tech/archives/922
Calendar APIについて
何も設定せずに使えるCalendarAppとは別に、拡張サービス(Advanced Google Service)として、Calendar APIが用意されています。
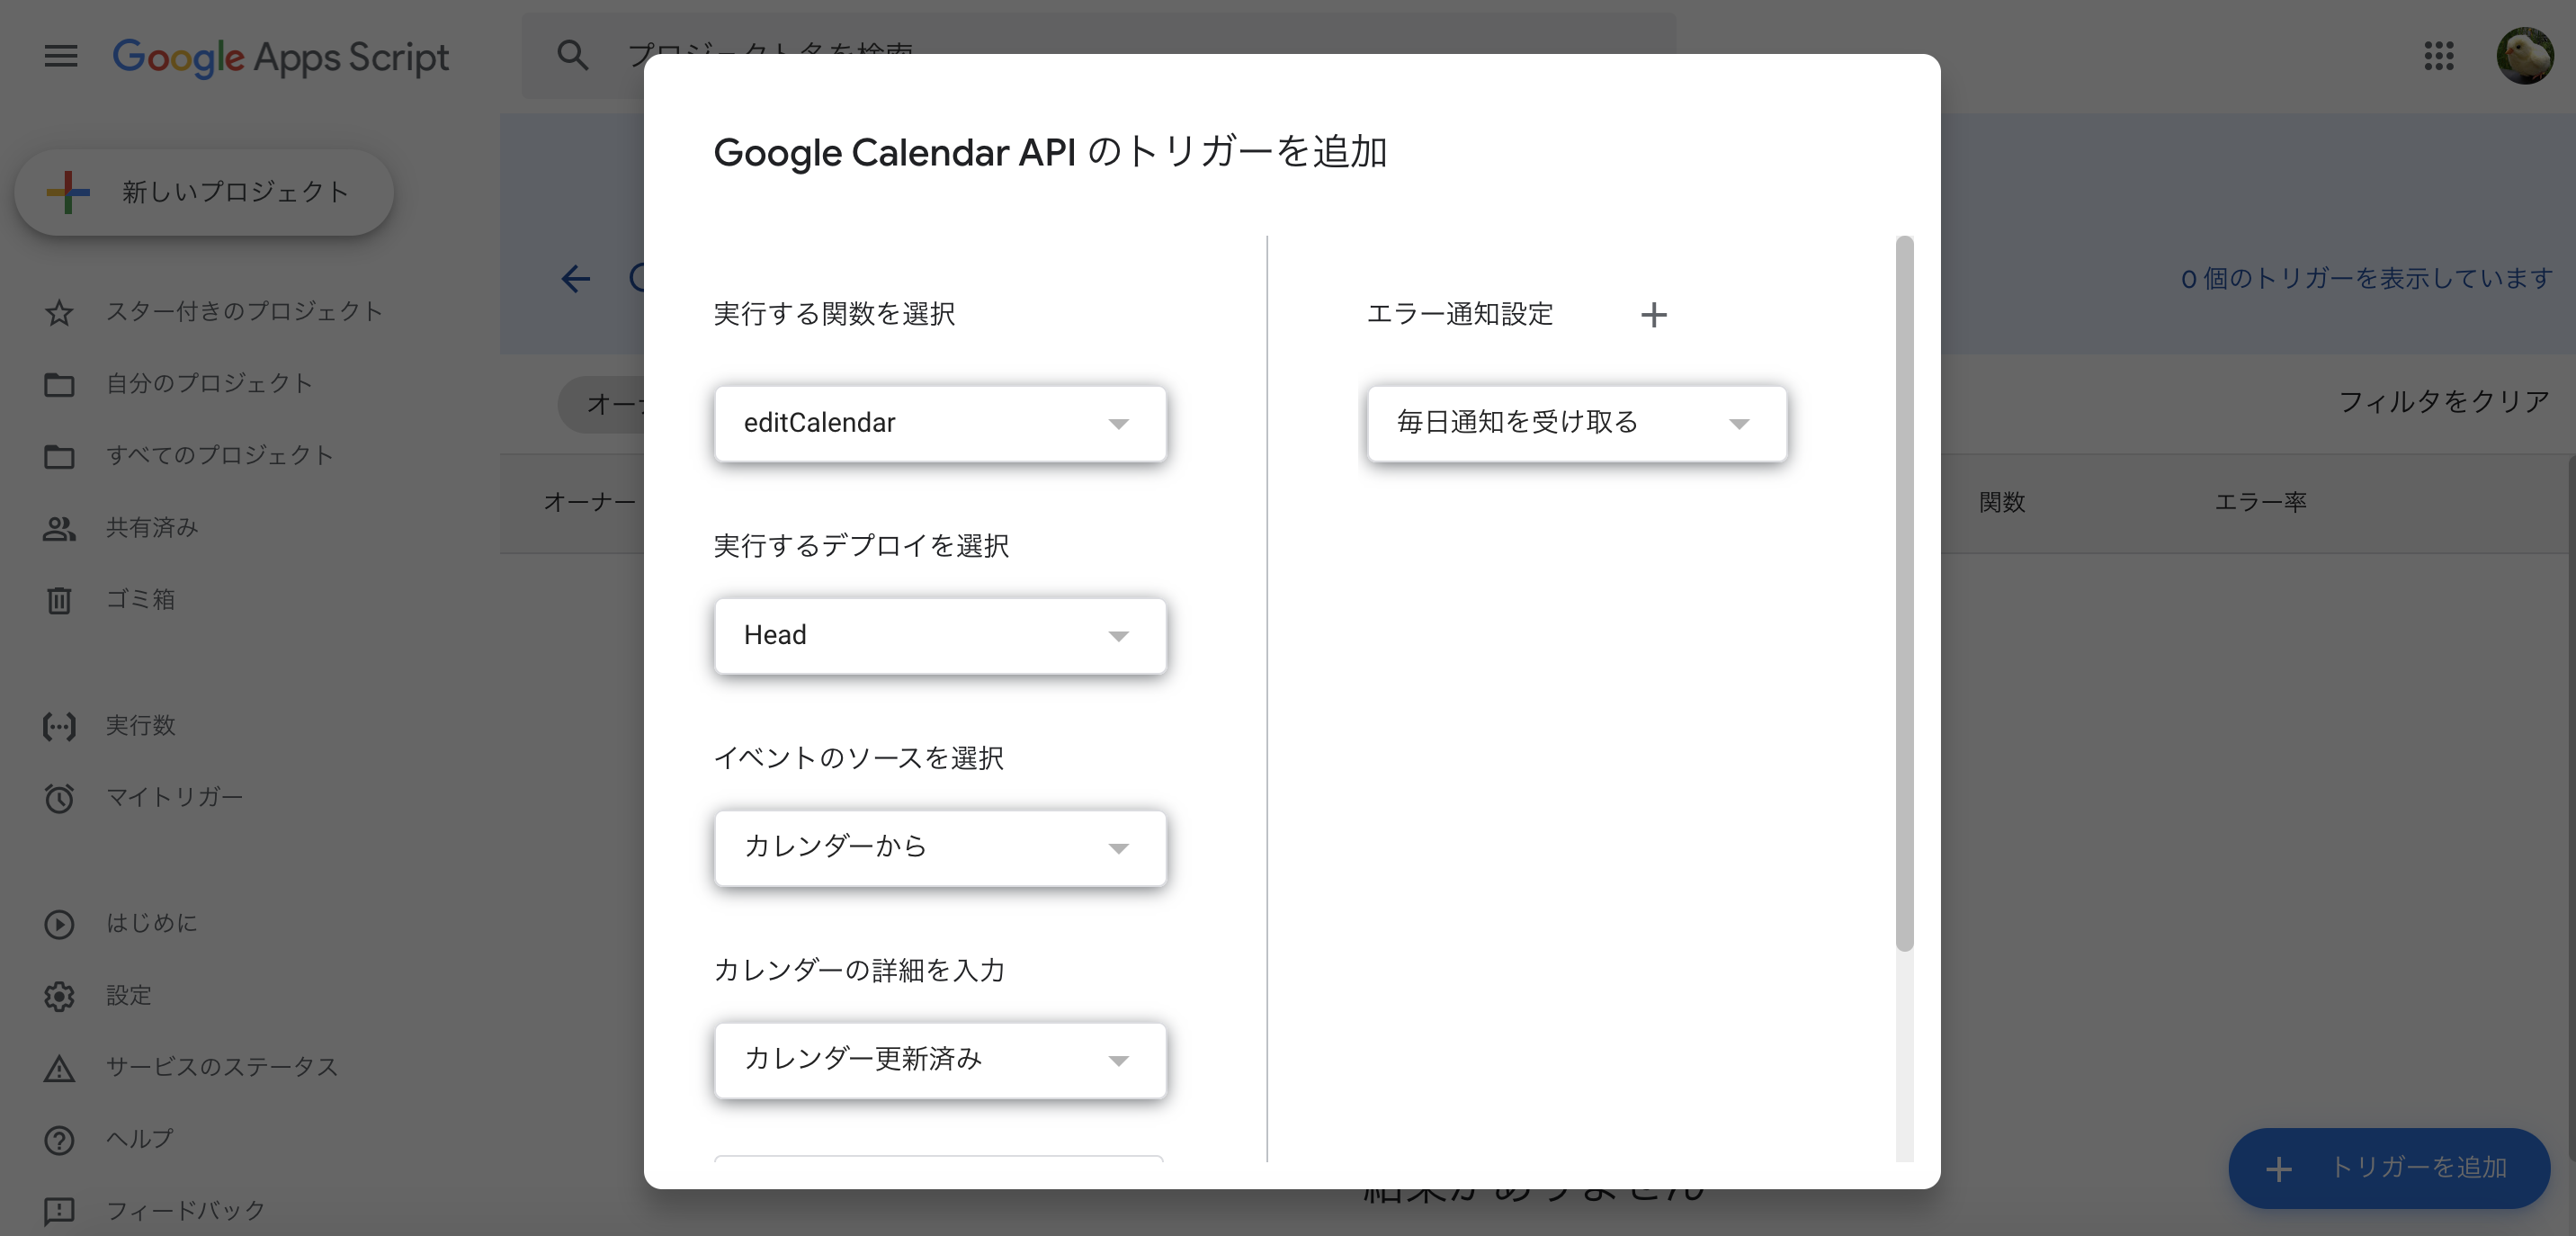
以下画像の部分からCalendar APIを有効にできます。

CalendarAppとの大きな違い
やはり、Googleカレンダー編集時に色々とできることが増えることでしょう。
カレンダー編集時にGASを起動することができるのですが、
例えば、デフォルトで使えるCalendarAppだけでは、何のイベントを編集したのかを取得することができません。
カレンダー編集時のGAS起動は、Calendar APIと一緒に使って初めて真価を発揮するもののようです。
リファレンスのサンプルを噛み砕いてみる
以下のことを噛み砕いてまとめています
https://developers.google.com/apps-script/advanced/calendar
イベントの作成
ほぼほぼサンプルコードのままです。
カレンダーのIDを取得するところとか変えてます。
/**
 * Creates an event in the user's default calendar.
 */
function createEvent() {
  const defaultCalendar = CalendarApp.getDefaultCalendar();
  const calendarId = defaultCalendar.getId();

  const start = getRelativeDate(1, 12);
  const end = getRelativeDate(1, 13);
  const eventParam = {
    summary: 'Lunch Meeting',
    location: 'The Deli',
    description: 'To discuss our plans for the presentation next week.',
    start: {
      dateTime: start.toISOString()
    },
    end: {
      dateTime: end.toISOString()
    },
    // Red background. Use Calendar.Colors.get() for the full list.
    colorId: 11
  };
  const event = Calendar.Events.insert(eventParam, calendarId);
  Logger.log('Event ID: ' + event.id);
}

/**
 * Helper function to get a new Date object relative to the current date.
 * @param {number} daysOffset The number of days in the future for the new date.
 * @param {number} hour The hour of the day for the new date, in the time zone
 *     of the script.
 * @return {Date} The new date.
 */
function getRelativeDate(daysOffset, hour) {
  const date = new Date();
  date.setDate(date.getDate() + daysOffset);
  date.setHours(hour);
  date.setMinutes(0);
  date.setSeconds(0);
  date.setMilliseconds(0);
  return date;
}
Calendar APIを使っているのは以下の部分ですね。
const event = Calendar.Events.insert(eventParam, calendarId);ですが、これはCalendarAppでもできる範囲ですね。
カレンダーの一覧
/**
 * Lists the calendars shown in the user's calendar list.
 */
function listCalendars() {
  let pageToken;
  do {
    const calendars = Calendar.CalendarList.list({
      maxResults: 100,
      pageToken: pageToken
    });
    if (calendars.items && calendars.items.length > 0) {
      for (var i = 0; i < calendars.items.length; i++) {
        const calendar = calendars.items[i];
        console.log('%s (ID: %s)', calendar.summary, calendar.id);
      }
    } else {
      console.log('No calendars found.');
    }
    pageToken = calendars.nextPageToken;
  } while (pageToken);
}
イベントの一覧
/**
 * Lists the next 10 upcoming events in the user's default calendar.
 */
function listNext10Events() {
  const calendarId = 'primary';
  const now = new Date();
  const events = Calendar.Events.list(calendarId, {
    timeMin: now.toISOString(),
    singleEvents: true,
    orderBy: 'startTime',
    maxResults: 10
  });
  if (events.items && events.items.length > 0) {
    for (let i = 0; i < events.items.length; i++) {
      const event = events.items[i];
      if (event.start.date) {
        // All-day event.
        const start = new Date(event.start.date);
        console.log('%s (%s)', event.summary, start.toLocaleDateString());
      } else {
        const start = new Date(event.start.dateTime);
        console.log('%s (%s)', event.summary, start.toLocaleString());
      }
    }
  } else {
    console.log('No events found.');
  }
}
条件付きのイベント変更
イベントを更新するための条件を設定することができます。
以下サンプルでは、作成したイベントが一度も編集されていないことを条件としています。(途中で30秒待っているので、その間にイベントを手動で編集すれば、イベントは自動更新されないような動きになります)
具体的には、 If-Match の部分で編集されていないことを判定しています。
function conditionalUpdate() {
  const calendarId = 'primary';
  const start = getRelativeDate(1, 12);
  const end = getRelativeDate(1, 13);
  const eventParam = {
    summary: 'Lunch Meeting',
    location: 'The Deli',
    description: 'To discuss our plans for the presentation next week.',
    start: {
      dateTime: start.toISOString()
    },
    end: {
      dateTime: end.toISOString()
    },
    // Red background. Use Calendar.Colors.get() for the full list.
    colorId: 11
  };
  const event = Calendar.Events.insert(eventParam, calendarId);
  console.log('Event ID: ' + event.getId());
  // Wait 30 seconds to see if the event has been updated outside this script.
  Utilities.sleep(30 * 1000);
  // Try to update the event, on the condition that the event state has not
  // changed since the event was created.
  event.location = 'The Coffee Shop';
  try {
    const updateEvent = Calendar.Events.update(
      event,
      calendarId,
      event.id,
      {},
      {'If-Match': event.etag}
    );
    console.log('Successfully updated event: ' + updateEvent.id);
  } catch (e) {
    console.log('Fetch threw an exception: ' + e);
  }
}
条件付きでイベントを取得する
イベントの取得にも条件をつけることができます。
以下サンプルでは、作成したサンプルが更新された場合、イベントの取得に成功するようになっています。( If-None-Match の部分で判定しています)
function conditionalFetch() {
  const calendarId = 'primary';
  const start = getRelativeDate(1, 12);
  const end = getRelativeDate(1, 13);
  const eventParam = {
    summary: 'Lunch Meeting',
    location: 'The Deli',
    description: 'To discuss our plans for the presentation next week.',
    start: {
      dateTime: start.toISOString()
    },
    end: {
      dateTime: end.toISOString()
    },
    // Red background. Use Calendar.Colors.get() for the full list.
    colorId: 11
  };
  const event = Calendar.Events.insert(eventParam, calendarId);
  console.log('Event ID: ' + event.getId());
  // Re-fetch the event each second, but only get a result if it has changed.
  for (var i = 0; i < 30; i++) {
    Utilities.sleep(1000);
    try {
      const fetchEvent = Calendar.Events.get(calendarId, event.id, {}, {'If-None-Match': event.etag});
      Logger.log('New event description: ' + event.description);
    } catch (e) {
      Logger.log('Fetch threw an exception: ' + e);
    }
  }
}
イベントの同期
この部分が一番の目玉ではないでしょうか?
この機能を利用すると、イベント編集時にGASを起動した時に、どのイベントが編集されたのかがわかるようになります。
以下はサンプルコードを少しいじっていますが、大体同じものです。
function editCalendar(e) {
  const calendarId = e ? e.calendarId : 'primary';
  logSyncedEvents(calendarId);
}

function logSyncedEvents(calendarId) {
  const properties = PropertiesService.getScriptProperties();
  const options = {
    maxResults: 100
  };
  const syncToken = properties.getProperty('syncToken');
  if (syncToken) {
    options.syncToken = syncToken;
  }

  // Retrieve events one page at a time.
  let events;
  let pageToken;
  do {
    options.pageToken = pageToken;
    events = Calendar.Events.list(calendarId, options);

    if (events.items && events.items.length > 0) {
      for (let i = 0; i < events.items.length; i++) {
         const event = events.items[i];
         if (event.status === 'cancelled') {
           console.log('Event id %s was cancelled.', event.id);
         } else if (event.start.date) {
           // All-day event.
           const start = new Date(event.start.date);
           console.log('%s (%s)', event.summary, start.toLocaleDateString());
         } else {
           // Events that don't last all day; they have defined start times.
           const start = new Date(event.start.dateTime);
           console.log('%s (%s)', event.summary, start.toLocaleString());
         }
      }
    } else {
      console.log('No events found.');
    }

    pageToken = events.nextPageToken;
  } while (pageToken);

  properties.setProperty('syncToken', events.nextSyncToken);
}
上記コードを(あくまで個人的な認識として)噛み砕くと、
- カレンダーを操作した時には、
syncTokenというトークン(文字列)が発行される - イベントのリストを取得する際に、syncTokenを指定すると、そのsyncTokenが発行された操作のイベントだけを取得できる
- イベントのリストを取得した際に、そのイベントのオブジェクトから、 次にカレンダーを編集した時に発行される予定のsyncToken も同時に取得できる
- なので、3.を記憶しておいて、カレンダー編集時に起動したGASで3のsyncTokenをイベント取得する際に指定すると、編集したイベントが取得できる
ということなのだと思っています。
次にカレンダーを編集した時に発行される予定のsyncToken が、コードの中では nextSyncToken という形で出てきています。
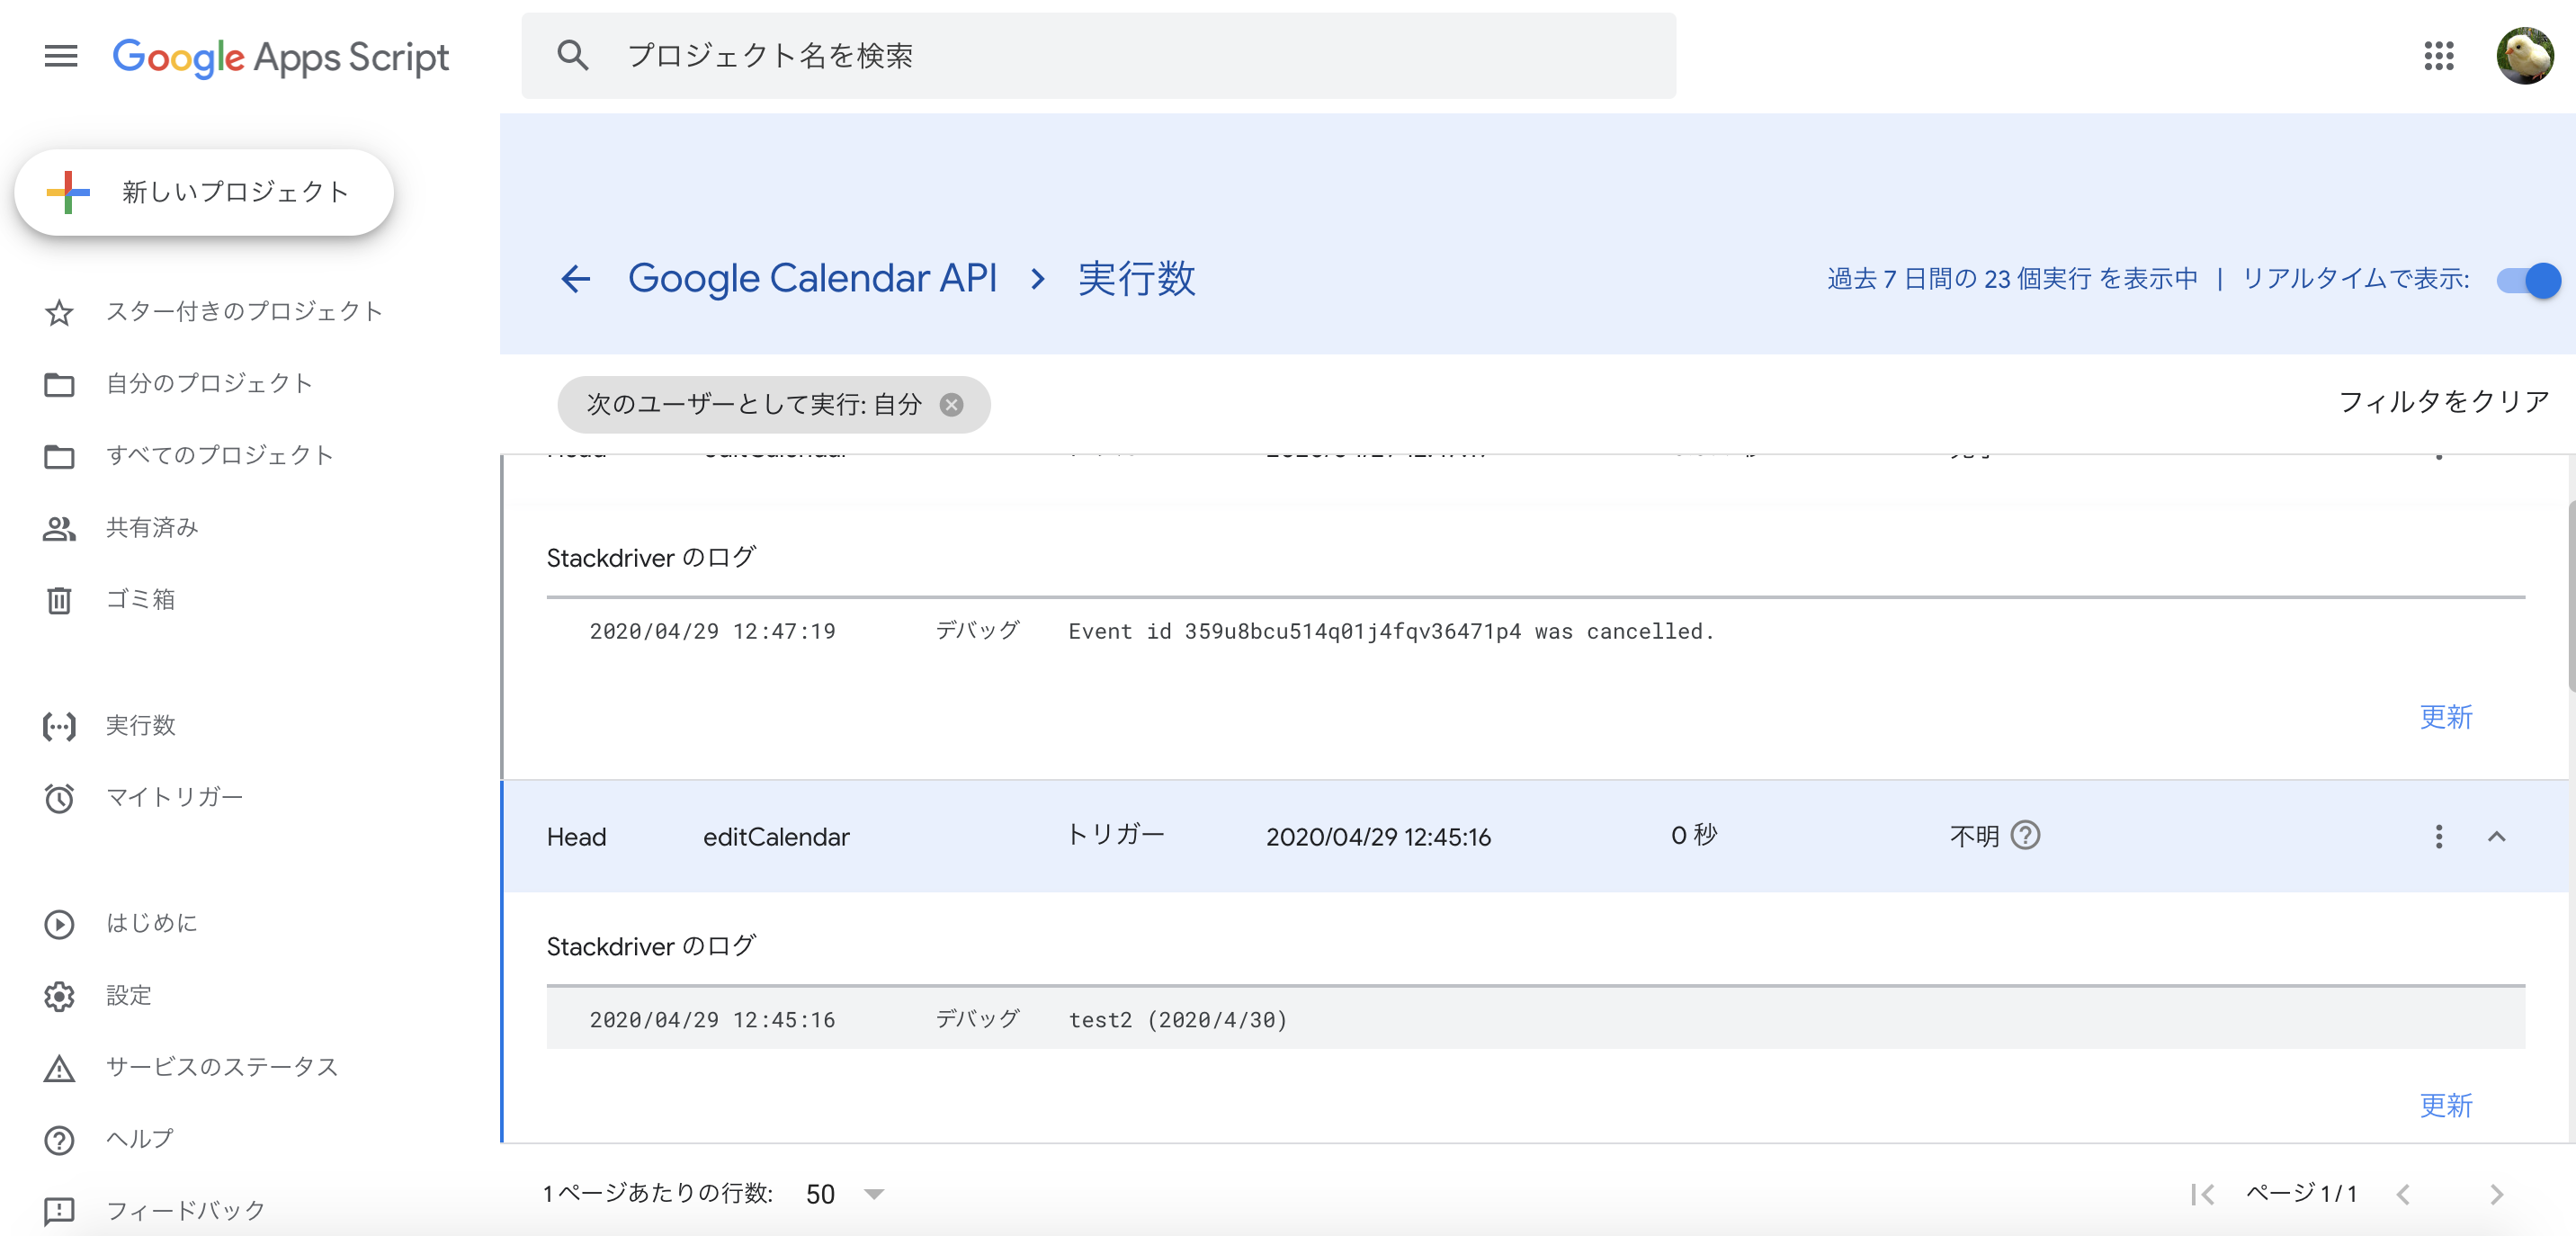
実際にカレンダー編集時をトリガーにして・・・
カレンダーを編集すると、GASが編集したイベントを捉えていることがわかります。
あとがき
カレンダー編集時に色々とできると業務の幅が広がりそうですね。